pond installation
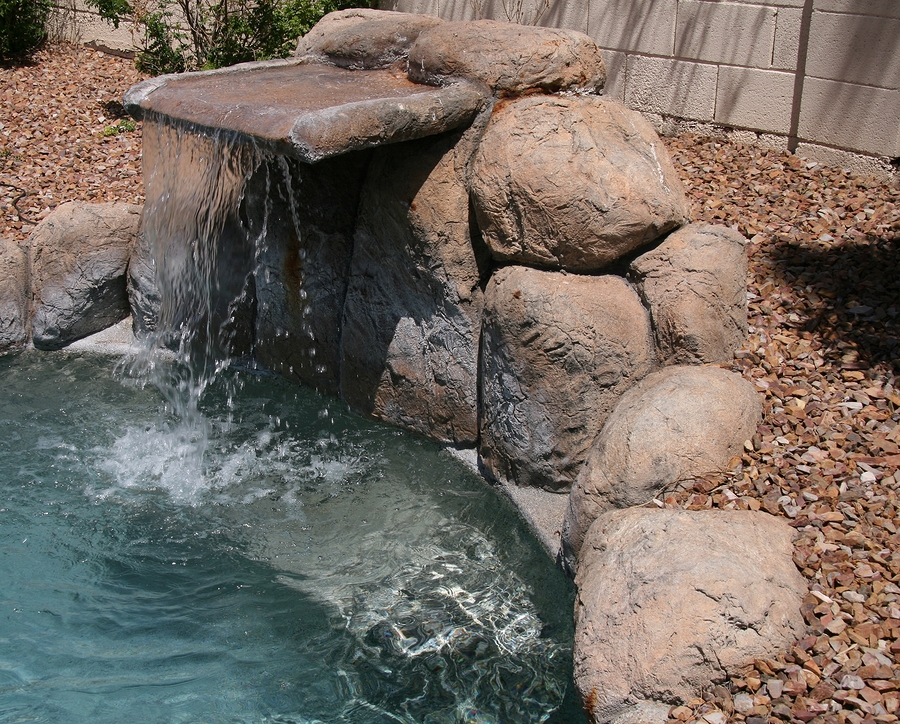
Before installing a pond there a few decisions that need to be made. One- Where you want your pond When installing a pond keep in mind that you will need a good mixture of sun and shade. Also, if you would like a waterfall; try to build the pond on a natural hill. It makes the look or the pond and the waterfall more natural and easier to install. Two- The style and size of your pond Take pond lining and create the shape of the pond you desire. Then determine if there will be any fish or plants in the pond. Knowing the depth that the fish or plants require will also help determine how deep the pond will need to be. As for the style of the pond, choose the materials that you would like around your pond. Rocks, pavers, or just line the edges with plant life. Take all this into account when planning to install a pond. Three- Pond Maintenance Choose how much maintenance you are willing to put into the pond. High Maintenance pond need taken care of daily and low maintenance ponds need tended to once or twice a month. Each take different filtration systems and skimmers. Four- The life in the pond Decide if you would like fish, tadpoles, and/or plant life in the pond. Each can have beneficial effects on the pond and can add to the enjoyment of the pond. Fish and frogs eat mosquitoes, eat algae and can fertilize plants. Also take into considerations the types or fish and plants that will be appropriate for the climate you are installing the pond in. Please make these decisions before making plans for a pond. Installation of your pond Use rope, extension cords, or pond liner to mark out your pond. Be sure to make the pond a little larger to leave room for landscaping. After you are happy with the shape and location of the pond take spray paint and outline your pond. Time to excavate the pond BEFORE excavating your pond call your local utilities provider to make sure there are no buried lines where you plan to dig. The pond will be dug with a variety of levels to create plant shelves. After the pond is dug plant shelves will be defined by hand. Plan for the pond to be 5” to 7” above the water level. The pond must be a minimum of two feet deep. A hole for the skimmer will be dug after the water level has been determined. Your skimmer should be directly across from the filter. Install the pond underlayment and liner. Be positive that there are no sharp objects in the excavated pond and lay the underlayment in the pond. If the pond is in sections be sure to overlap the underlayment a few inches and conform it to plant shelves and shape of the pond. Then install the pond liner the same way the underlayment was installed and leave lots of extra near the filter and banks of your pond. Do not trim the underlayment or liner until the pond is full. Adding rocks to the walls of the pond it add to the ambiance of the pond and provides protection for the liner and a surface for needed bacteria. Using septic stone on the bottom is recommended. Next the skimmer and filter will be installed All that is left is the finishing touches. As soon as the desired water level is reached trim some of the underlayment and liner leaving several inches. Then bury and cover with rocks just in case extra is needed in your pond’s lifetime. Then the skimmer and filter will be plugged in and the water will become cloudy from stirring up rocks and dirt. The pH levels will be balanced to make water clear and a few days later feel free to add plants and fish to your pond. |
|
- Home
- About
-
Services
- Curbside Leaf Pick Up
- Excavating
- Fence Installation
- Fertilizing
- Garden Railroading
- Garden Tilling
- Grounds Maintenance
- Hardscaping
- Hydroseeding
- Landscaping Construction
- Landscaping
- Lawn Installation
- Mowing
- Pond Installation
- Pondless Waterfall
- Power Washing
- Putting Green
- Retaining Wall
- Snow Removal
- Sod Installation
- Staining Decks
- Tree Service
- Trimming
- Weed Control
- Contact Us
|
Elkhart Landscape
Email: elkhartlandscape@gmail.com Phone: 574-607-4750 URL: www.elkhartlandscape.com Address: Elkhart, IN Location |
Terms Of Service & Privacy Policy |
Landscaping and Snow Removal Service in Elkhart, IN !! Call: 574-607-4750